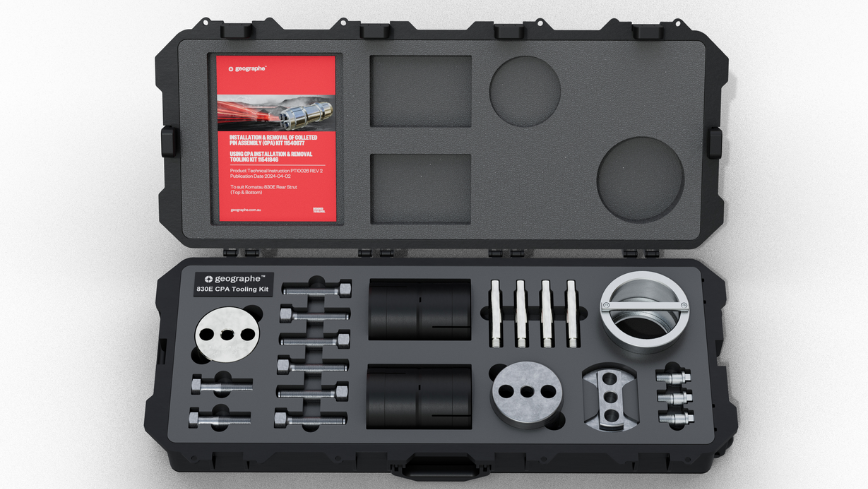
As part of Geographe’s Specialised Tooling range, Geographe has developed the Colleted Pin Assembly (CPA) Tooling Kit to support the installation & removal of Geographe’s Colleted Pin Assemblies, designed to suit Komatsu 830E and 930E Haul Trucks.
We understand the importance of mine site safety, efficiency, and increased machine longevity to miners and off-site repairers; that is why the CPA Tooling kit provides a lightweight design that reduces handling risks and deviations from safe work practices. While making the installation and removal more time efficient, it decreases machine downtime for maintenance.
See below our step-by-step guide for the installation process and instructions for disassembling the assembly from the truck.
Installation
When installing the Geographe Colleted Pin Assembly using the Geographe Tooling Kit, it is key to clean all surfaces of contaminates. Prepare the truck rear axle and chassis mount bores by inserting the two tooling sleeves into position.
- Prepare the strut cylinder bores by inserting the polymer spacer holder and spacer rings.
- Prepare the colleted pin by fitting the guide sleeve, alignment handles and positioning plate.
- Position the strut between the housings.
- Install the pin starting from the centre of the truck and leading the fitment with the guide sleeve – the polymer spacers will be pushed out as the pin slides through the bores.
- Remove the guide sleeve.
- Install the first collet on the trye side of the arrangement. Centre the pin by pushing or lightly tapping the other end of the pin until the positioning plate is hard against the housing shoulder.
- Fit the blanking plate, washers and tighten bolts until the collet is secure.
- Remove the setting plate from the opposite end to the secured collet.
- Install the second collet and fit the blanking plate and washers and tighten bolts to secure the collet.
- Further tightening of the collets will be required to reach final torque values.
- Fit the bolt anti-rotation plate .
The Geographe Colleted Pin is in position and secure.
Removal
To disassemble the Colleted Pin Assembly from the truck:
- Remove the anti-rotation plate.
- Remove bolts, washers and blanking plate from the tyre side of the assembly.
- Use the jacking screws to release the collet from the mating parts.
- Repeat this process on the other end.
- Fit the alignment handles to the pin.
- Slide the pin out of position.
For more information on our CPA Tooling Kit, watch the video below:
Be abreast of Enhanced Performance Solutions for Mining Parts
How can we help?
Submit your details below and our team will contact you.
